Invitation Details: Envelope Liners
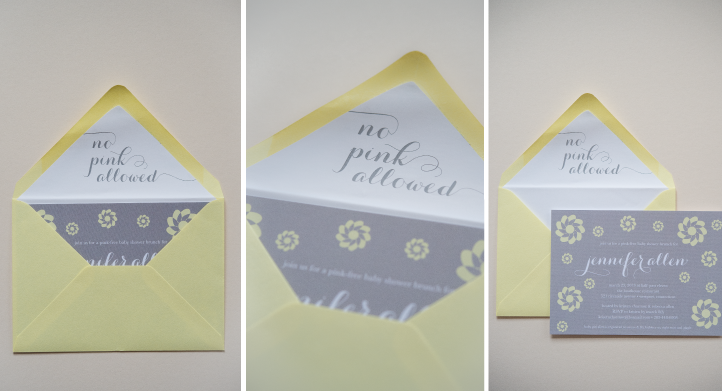
As promised, here is the first installment of my "Invitation Details" series, which was introduced when guest blogging for my girl Brooke (from Brooke Allison Photo). Today I'm starting off with one of my favorites: envelope liners! It's kind of become my signature thing, and clients are constantly asking for them this season. It is a way to tie in one aspect of your wedding that may not be represented in your suite (such as color or texture) without blowing your budget Pre-made envelope liners can be purchased, but often you are limited to only certain colors or patterns. With custom liners, you get exactly what you want for your paper story! Today I'm sharing a recent job of mine that used envelope liners in a particularly playful way! Check out the pictures below from this seriously fun project. The result...Some important things to remember when taking on a project like this: -Not all envelopes are created equal. Make sure that you measure the envelope you are using before trimming the liners! -Paper wrinkling: it's real, and it could happen to you. Because of this, the type of adhesive you use is supremely important. I prefer the tape dispenser rolls you can get at Staples or your local craft store. There's no liquid so you don't have to worry about over-applying the adhesive. -Get ready to hunker down for the evening! If you're taking this on as a DIY, there's no shortcut to make this go faster. It's a lot of trimming and adhering, but the result is definitely a show stopper. And don't forget that Roseville Designs offers this premium service to clients. You get the fun detail without all the manual labor! Thanks to Brooke Allison for the lovely photography (be sure to check out my updated portfolio on the site as well!).